Tutorials
Tutorial 1: Creating a Sky
In this first tutorial you'll learn the basics of creating realistic skies through the use of the DreamScape Sky atmospheric.
In 3ds Max, select File->Open, and from your \Scenes\DreamScape\Tutorials folder, select the file Tut1-start.max.
This file contains only a camera (Camera01) object. To be able to render the sky and clouds, we need to create the DreamScape Environment entry first.
Go to the Rendering->Environment menu, then from the Atmosphere rollout click Add.
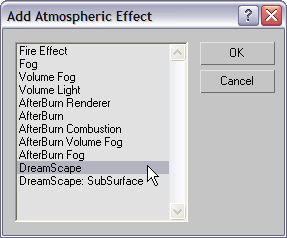
From the Add Atmospheric Effect dialog choose the DreamScape entry then click OK to add it to the Effects list.
At this point, you have a DreamScape Sky in your scene, but if you render, you won't see anything (in fact, you'll get a warning in your scene). For the DreamScape Sky to be illuminated we need to create a DreamScape Sun. The DreamScape Sun is the only light that can illuminate the sky. In this scene, we're going to create the beginning of a sunset.
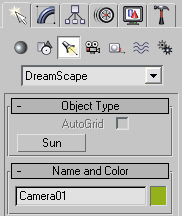
To create the DreamScape Sun go to the Create command panel, select the Lights option, and from the dropdown menu, pick DreamScape and then Sun.
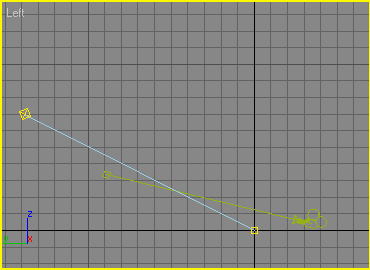
Activate your Left viewport and create the Sun as shown in the image below. The Sun position should be similar, as follows: (XYZ: 9, 138, 70) and the target position should be close to the Origin(XYZ: 0, 0, 0).
NOTE: You can place the light and its target exactly by selecting Tools-Transform Type-in or by pressing the F12 key. Make sure you're in Move/Transform mode, then use the Move Transform Type-In menu->Absolute World coordinates and enter the above coordinates.
If you examine the DreamScape Sun user interface (UI) you will notice that the color of the Sun isn't white, but pale blue. This is because the spectrum of our Sun is slightly blue when observing it from outside of our atmosphere. As you'll soon see, the color of the Sun has a great impact on the Sky color.
For basic sky creation, all you need to do is to create the DreamScape entry and the Sun light object.
Switch to the Camera01 viewport and render the scene.
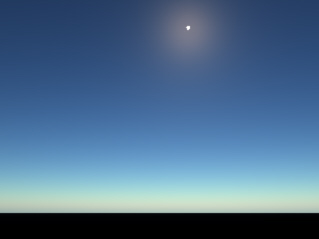
Not bad for a quick start, but the Sun is too small and the atmosphere seems a bit too clear. So well adjust the DreamScape settings to achieve this effect.
Instead of re-rendering the Camera viewport over and over to get the desired effect, and since the sky setup usually requires parameter changes that are hard to visualize otherwise, DreamScape comes with a useful Preview window to assist you in building your skies.
Back within the Dreamscape rollout, click on the Preview icon  to open the Preview window.
This window is divided into two panes; the left displays the entire sky as set in your scene, and the right displays a grayscale map of any clouds you add to your sky. By default, both panes are empty as neither the sky or the clouds are active. The first thing we want to do is activate the sky option.
Within the DreamScape Sky Preview, click Views->Sky.
Again, click the Views option, then choose Automatic Update.
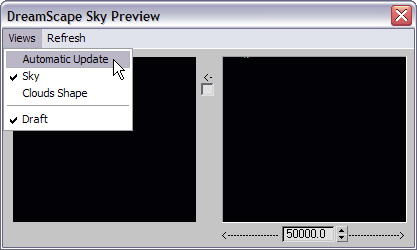
When you opened up the Views menu the second time, you should have noticed that the Sky option had a checkmark next to it. This indicates that it is active. Since we are not modeling clouds in this first tutorial, we will simply ignore the Clouds Shape option under the Views menu.
Also worth noting here is that for existing DreamScape 1.0 users, there is a new Draft option, and it is active by default. This option puts the Preview window viewports into draft rendering mode, which is a much quicker (if not quite as refined) way to see updates as you make changes to the DreamScape atmospheric parameters.
Next, click on the Refresh menu option to refresh the Preview window.
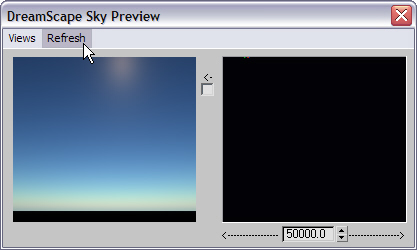
Because the Automatic Update option is enabled, all the changes we do from this point forward will be reflected in the left pane of the Preview window.
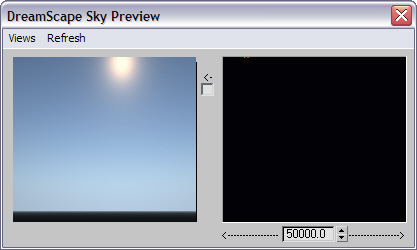
Now we would like to make the Sun glow a little bit stronger and sharper since we're looking almost directly into the Sun.
Go back to the DreamScape UI and under the Sky group of controls within the Atmosphere Parameters rollout, set the Glow spinner to 5.0 and the Glow Sharp spinner to 0.93.
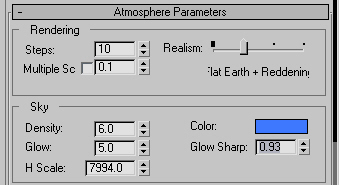
To add a little bit more haze to a clear day, set Haze Density to 5. As this parameter will add haze to the scene, the Sun's glow will become weaker because the Sunlight has to penetrate the haze layer.

As you can see, the entire sky becomes grayer and the sun's intensity drops. However, many times you won't want haze over the entire sky. Notice that the haze H Scale (Height Scale) spinner is set to 1200 by default. In this case, we want to make a city-like low haze or pollution layer.
Set Haze H Scale to 300. This will make the haze falloff much faster.
Last, let's make the haze a little brighter by setting the Haze Brightness to 1.5.
Activate your Camera01 viewport and render the scene.
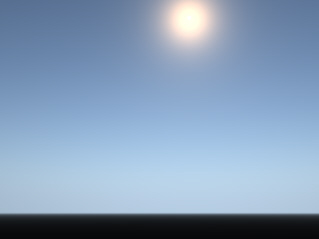
As you can see, setting up a sky with DreamScape is fairly simple. With only a few adjustments, you can quickly create a backdrop for any outdoor scene. But there's much more to skies than just the sun and haze.
In the next tutorial, you're going to build on this simple foundation and add some clouds as well as push the sun further down towards the horizon to create a good looking sunset.