Introduction
AfterBurn is an advanced volumetric particle effects engine plug-in that works exclusively with Autodesk Media & Entertainment's 3ds Max program, and gives you the ability to create realistic smoke, clouds, explosions and other organic fiery and gaseous effects. AfterBurn is designed to work in concert with the integrated 3ds Max particle systems to augment their effects, and, in many cases, to create visual effects that you could not achieve easily using the 3ds Max program's native tools. AfterBurn makes it possible for you to create convincing exhaust trails from rockets and missiles, fiery explosions that rival the real thing, swirling tornados that can rip buildings to shreds, gooey lava flows and much more. Just think of this tool as your organic effects generator within the 3ds Max environment.
AfterBurn is an incredibly powerful plug-in, used currently by major film effects companies, computer game developers, and "boutique" video production houses to create amazing visual results. We are glad you've invested in this powerful application to enhance your work, and we hope you're eager to get started.
But before you dive into the tutorials, we strongly recommend that you read this section first, to understand exactly the way AfterBurn works. It will give you a better understanding of the way you set up an AfterBurn effect, the way it behaves, and what sort of advanced controls you will have at your disposal.
As an effects artist and creator, you can use this knowledge to consider how AfterBurn will affect and interact with your scenes, and how you need to prepare your 3ds Max particle systems to take best advantage of this astonishing plug-in. Now, let's get started.
Understanding how AfterBurn works
As mentioned earlier, AfterBurn is an advanced particle effects engine. To work with it, you need to have a particle system already present in your scene. If you are new to particle systems, you may first want to go through the tutorials provided with 3ds Max, covering these object types. Since you won't create any new particle systems within the AfterBurn tutorials, once you get familiar with the native 3ds Max particle tools and the forces that act upon them, you can then make adjustments to the AfterBurn tutorial files and fine-tune the effects that AfterBurn produces.
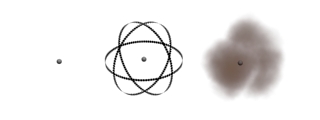
To start, what is a particle effect in 3ds Max? In general terms, a particle effect takes the appearance of particles within a specific particle system and transforms them to look like something entirely different. When you add an AfterBurn effect to your particles, the AfterBurn engine will create a volumetric "puff" surrounding each individual particle within a chosen particle system. (Think of it as a sort of a spherical cloud.)
In the example below, you can see a single particle represented on the far left. In the center, is the representation of the AfterBurn volumetric puff as defined by the user. Finally, on the right is the volumetric effect created when rendered.
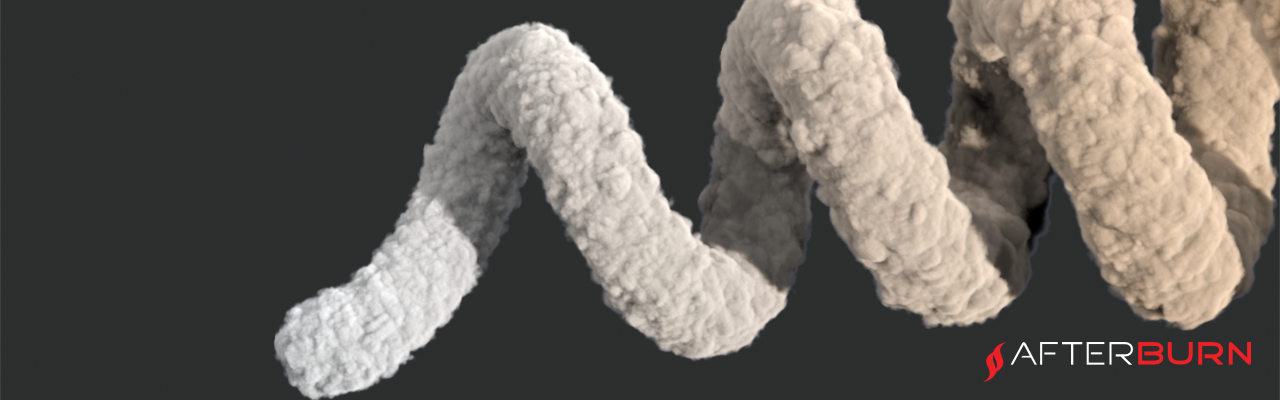
When these "puffs" overlap, they tend to blend together, creating the illusion of one larger, organic entity, like the dust storm below.

Image courtesy of Allan McKay
Of course, the appearance of these puffs, their coloration and noise parameters, as well as the degree of their blending together will be entirely up to you, and that's half the fun while working with AfterBurn! There are plenty of options, so you can tweak your effects to get very specific results.
Additionally, you don't have to worry about rendering test frames endlessly to see how your AfterBurn effects will look, since the plug-in comes with a sophisticated preview engine, taking the guesswork out of your setup.
In the following sections we'll cover the basics of AfterBurn operation, along with the locations of AfterBurn's major plug-in components.
Particle System Information
Before creating an AfterBurn effect, you need to build a particle system within 3ds Max. By default, AfterBurn supports all of the built-in particle systems that come with 3ds Max, as well as Krakatoa??? and Thinking Particles???.
Many of these particle systems give you the ability to set the life span of the particles over time. This way, the particles are born at a specific point, live for a given period of time and then die. AfterBurn can take advantage of these particle settings and apply them automatically to the volumetric puffs that it creates.
For example, if you have a Super Spray particle system set up so the particles are born on frame 10 and live for 30 frames, AfterBurn will recognize this and automatically adjust it's settings to match for the puffs it creates. The result is that your particles and their corresponding AfterBurn effects are always in sync. By default, AfterBurn is aware of the built-in particle systems, and you won't have to manually set any lifespan parameters. Be aware that certain commercial and freeware particle system plug-ins may require you to set the lifespan for the AfterBurn volumetric effects manually. Once your particle system is set up, you then need to apply AfterBurn to it.
When it comes to particle systems, you should spend some time learning how they work, how you can control them, and what they are capable of on their own. This is important as much of AfterBurn is reliant upon how these particle systems move around your scenes. There are a number of tutorials that come with the 3ds Max software. You can also go onto the Internet as there is quite a bit of information as well as countless tutorials covering how to work and master the particle systems.
AfterBurn Environment
AfterBurn contains a set of 3ds Max environmental effects that resides within the Rendering->Environment dialog. This is the core of the AfterBurn plug-in, and the place where you will spend most of your time creating and fine-tuning your effects.
Please note that since much of AfterBurn is set up as Environmental effects, these effects does not create any actual geometry in your scenes.
In addition, you are not limited to a single AfterBurn effect in your scene. You can either add one AfterBurn entry to affect selected particle systems globally, or you can add multiple AfterBurn entries for different particle systems.
AfterBurn also comes with three different rendering technologies: the Raymarcher, the Octane Shader and HyperSolids. Between them, you can create just about any organic particle effect you can dream up. Raymarcher is the photorealistic engine, while the Octane Shader is AfterBurn's ultra-fast render system for dust and more transparent effects. HyperSolids is a special engine for creating blobby, organic forms and other procedural solid looking objects as shown below.
AfterBurn Daemons
AfterBurn Daemons are helper objects that affect AfterBurn and AfterBurn Combustion in different ways. (Think of them as "Space Warps for volumetrics.") These daemons affect the volumetric effects by altering the noise and shape of the puffs.
For example, the wind daemon can affect the puffs and make them appear as if they are moving in a particular direction.
AfterBurn ships initially with a number of Daemons. For any AfterBurn effect to take advantage of these daemons, they must be added to the respective plug-in slot.
If there is more than one Daemon applied to the same effect, you need to take care about which one is going be applied first (the final effect can look different!) You can control this by re-ordering Daemons in the AfterBurn or AfterBurn Combustion [Pick Sources/Daemons] Combo Box.