Post Processing
In this tutorial you will learn how to use Retimer to change caches playback and how to optimize caches.
In 3ds Max, select File->Open, and from your /Scenes/FumeFX/ Tutorials folder, select the file Tut_06_start.max.
Retimer allows you to change the playback speed of existing caches while Optimizer helps you to keep cache sizes at the minimum.
In Tutorial 5 you have learned how to use Wavelet Turbulence and we are going to use it in this tutorial as well, but we won`t go in detail.
Because Wavelet Turbulence and Retimer use their own caches for output, make sure that inside FumeFX Preferences, Auto Synchronize Paths is enabled.

Inside the FumeFX Output rollout, change Output Path so that is valid on your machine (it is currently set to C:\tut_06_start\FumeFX01_.fxd). Since we had Auto Synchronize enabled, Wavelet Turbulence and Retimer Output paths will be changed as well.
Select the Sim tab and scroll down to the Extra Detail rollout and change the Mode to Wavelet Turbulence.
Note: The Velocity channel has to be exported whenever you are going to use Retimer. Additionally, the Temperature channel also has to be exported if you are using fire in your scene. Without those channels, retiming cannot be performed.
Select Gen tab and scroll down to the Output rollout. Click on the Exporting Channels Set button and add Temperature and Velocity. Actually, Velocity is automatically added when you have selected Wavelet Turbulence Extra Detail Mode, but in the case you`re not using Wavelet Turb. you have to add it manually.

Click on Simulate button and wait until simulation ends.
Note: This tutorial could take a bit longer to compute (it takes 12 minutes for Default Simulation to complete on i7 920 CPU).
For this tutorial we`re using mental ray as a renderer to create global illumination effects.
In order to render FumeFX through mental ray, you need to enable the Auto Volume option inside mental ray`s Renderer tab first.

Next render frame 35 and keep it for comparison with Wavelet Sim.
Change the Sim. Mode to Wavelet and run the simulation again.
This will compute Wavelet caches with spacing of 0.5 (Grid size of 1.0 and a Detail Scale of 2.0 - 1.0/2.0 = 0.5). On our test machine it took 9 minutes for Wavelet simulation to finish.
Open WTP tab and change Fire Strength to 4.0 and Smoke Strength to 4.0.
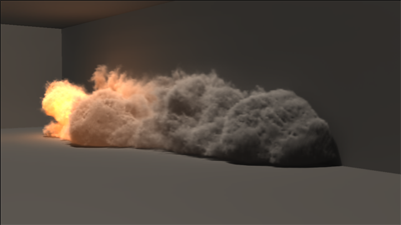
Select Wavelet from the Cache dropdown list and render frame 35. Notice much more detail compared to the Default cache!
Now, we`re going to retime our caches and to add a slow motion effect in the middle of our animation. At the same time, we will optimize the caches by stripping all the data that we don`t need anymore.
Select the WT-P tab and scroll down to the Post Processing rollout.

Since we`re not going to need Velocity, Temperature and Wavelet Turbulence information anymore, select those checkboxes.
There is another option called Minimize Grid that will tighten grid around non-empty voxels as much as possible. This will result in smaller and more compact caches. Minimize Grid checkbox is enabled by default.
We are going to use Time Scale Factor retiming method, where value is already animated. Between frames 30 and 60, it goes from 1.0 to 0.1 and back again to 1.0. A Factor of 0.1 means that cache will be 10 times slower.
Since we are going to retime the Wavelet cache, make sure that the Wavelet cache is selected.
Next change the Sim Mode to Post and click Run Post Processing button.
The following dialog will be opened during the retiming process.

Once this process is completed, you can open your caches folder and compare cache sizes:
FumeFX01_0100.fxd: 51 Mb <- Default cache
FumeFX01__wt_0100.fxd: 147 Mb <- Wavelet cache
FumeFX01__pp_0230.fxd: 13 Mb <- Post cache
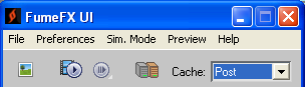
The able to view and render Post caches, you need to change input caches to Post.
You can automate this whole process through MAXScript as follows:
-- Select Default cache
$.SelectedCache = 0
-- Run Default Simulation
$.RunSimulation 0
-- Run Wavelet simulation
$.RunSimulation 2
-- Select Wavelet cache
$.SelectedCache = 1
-- Run Post processing
$.RunSimulation 3
-- Select Post cache
$.SelectedCache = 2
Render out the entire retimed animation to view your results.