FumeFX
The heart of FumeFX resides within its simulation engine. This entire, quite sophisticated system is built around a very simple object called the FumeFX Grid. You can think of the FumeFX grid as a 3-dimensional representation of a volume in which the simulation of smoke and fire will take place. Whatever size volume you define when you drag out the FumeFX grid will act as a set of boundaries for the simulation.
In order to create a FumeFX grid in your scene, simply go to the Create Command Panel and from the Geometry dropdown menu, select FumeFX -> FumeFX.

Once selected, like any other object inside of 3ds Max, simply drag out the new volume in any viewport. When done, you`ll get a yellow rectangular wireframe box like the one shown below.
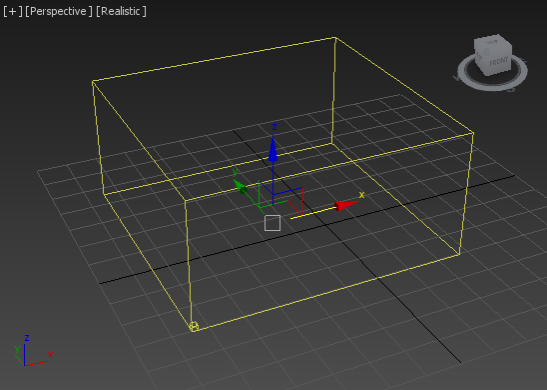
The FumeFX Grid
Note: Unless you`re using "Boundless" grid options, no simulation will take place outside of this volume.
Since FumeFX is based on real-world computational fluid dynamics, something to consider is the scale of your scene. Just like other simulation engines, you will get unpredictable results if your scenes are microscopic or gigantic in scale. Imagine a matchstick simulation where the geometry is over a mile long in real-world unit - the precision and accuracy of the simulation would not be to the correct scale of the desired result, so be sure to watch the scale of your scenes.
The FumeFX Grid
The FumeFX grid is a core element of FumeFX. It consists of an area of voxels that will be affected by simulation. By choosing the size of this grid, you set the maximum limits for the simulation area. Within the boundaries of this space, an adaptive grid expands and shrinks to contain just those voxels that are producing fluid.
Grid detail level is set with grid spacing. If you cut the spacing in half, you will increase detail, but also dramatically increase the size, memory, and time required for simulation.
You add this grid into your scene from the main Command Panel in 3ds Max. To do this, first choose the Create Geometry icon; then, select FumeFX from the drop down menu of categories. Now you can click and drag in the active viewport to create the grid or create a default grid straight from the FumeFX toolbar.
The FumeFX Grid
It is important to realize that within the Grid is a set of voxels (Volumetric Pixels), and the density of this volume can be manipulated to get higher or lower precision within the same space. The volume within the FumeFX container is automatically sub-divided into a set of equal sized rectangular "cells", stacked on top of one another, and each one is designed to contain data pertaining to the simulation within them. Since artists are visual by nature, users can visualize this grid at any time to get a better idea of how much detail their simulation will have.
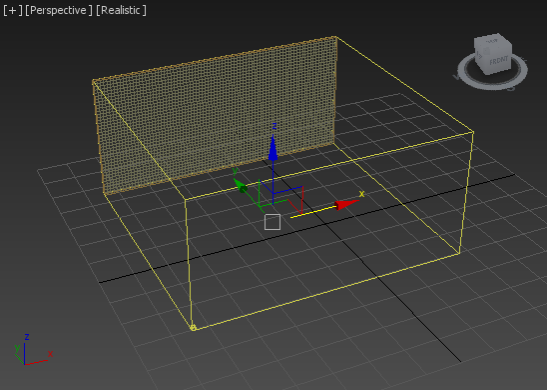
FumeFX Volume Grid display (lower resolution)
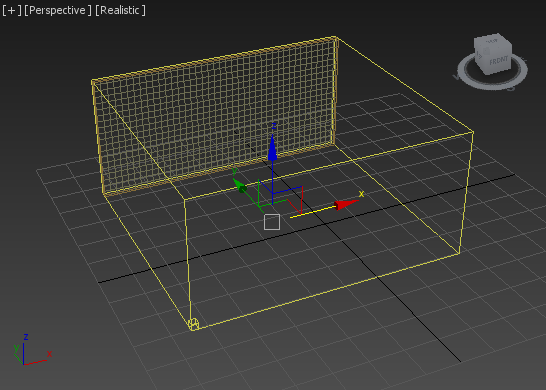
FumeFX Volume Grid display (higher resolution)
Note: It is important to remember that the higher the detail within the volume, the longer the amount of time it will take to run the simulation and the larger the amount of storage it will require. See the System Requirement explanation in the Overview to help you determine your storage requirements.
Once you`ve gotten your FumeFX Grid placed within your 3ds Max viewports, it`s time to go to the Modify Command Panel.
With the FumeFX Grid selected, you`ll be presented with the controls and rollouts necessary to access the power within FumeFX and also serves as a starting point for your interaction with FumeFX. It contains two rollouts: General Parameters and Viewport. From these rollouts you can access other parts of the interface, edit your preferences, modify parameters of the FumeFX Grid, or control the way that your simulation appears in the 3ds Max viewports.
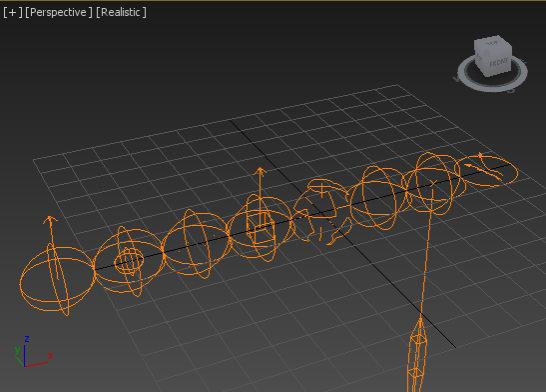
FumeFX Sources
Where the FumeFX Grid handles all of the heavy lifting once a scene has been set up and is ready for simulation, the system can`t do anything without sources to simulate with. Sources in FumeFX define everything from a point of origin for the simulation to begin (the "fire starter"), to more complex collision objects and forces (like Wind and Gravity) that will react with the simulation as it progresses.
Unlike particle based effects which fake smoke and fire behavior, FumeFX uses true physics so that selected objects can spontaneously burst into flame and react to other objects within the scene. These sources are the building blocks upon which simulations are built.
In order to associate objects with FumeFX, you create helpers to make the simulation engine "aware" of the selected objects within the FumeFX Grid volume. These non-rendering helpers have additional parameters associated with them so that users can fine tune how the source will affect the final simulation.
Simple Source, Geometry Source, Particle Source, FumeFX Source, Effector, Void Source, Gravity and Spline Follow.
To learn more about FumeFX Sources, click here.
Simulation
Simulations are created through the calculations of the FumeFX solver. This proceeds in steps that correspond to 3ds Max frames; or, if you require greater accuracy and stability, it can also simulate in multiple steps per frame.
Simulation stems from whatever object that you pick as your FumeFX Geometry Source. In the parameters for this source, you will choose the values for smoke, temperature, fire, and velocity - the main elements of simulation. During simulation these values are set at every voxel that the source touches.
At the beginning of each step, the FumeFX solver applies any external influences that are within the boundaries of the grid. These can be FumeFX sources that add fire, smoke or movement; space warps that will force fluid movement similar to the way in which they force particles; or even solid objects that block or interrupt fluid movement. Then, forces such as gravity and buoyancy are applied. And finally, "post-processing" is done; this is where forces such as dissipation and diffusion are applied, fuel is burned and smoke is created.
The results of the simulation are saved at the end of each step in files - with the extension ".fxd" - that remember the values for each voxel within the FumeFX grid. Simulation is done with floating point precision; output files are saved with half that precision. You will need a lot of disk space for long and detailed simulations, perhaps tens of Gigabytes (see Memory Requirements for more details).
After the simulation is finished and caches saved, it is possible to further refine the existing simulation by adding details using Wavelet Turbulence mode. Wavelet mode operates on the Default mode caches by upscaling them and applying procedurally generated detail and swirling.
As a final step, it is possible to optimize caches and even to retime them by using Retimer mode.
Memory requirements and recommendations
FumeFX operates on three-dimensional grid of voxels; accordingly, a grid of 10x10x10 means 1000 voxels. Each voxel requires one float (4 bytes) per Smoke, Temperature, or Fuel/Fire channel, or three floats (12 bytes) per Velocity or Fluid Mapping channel.
During simulation, FumeFX uses approximately double the memory than is needed for output of the results. And, you will need roughly twice that amount, should you choose to export texture coordinates. Memory usage of the simulation is displayed on the status window while the simulation runs.