FumeFX and tyFlow’s Fluid Force
In this tutorial you will learn how to use tyFlow’s Fluid Force along with FumeFX to move leaves through the air.
For a start you will need a startup file that can be downloaded from: https://bit.ly/3uPETZM
In 3ds max, select File->Open, and then the file FluidForce_start.max
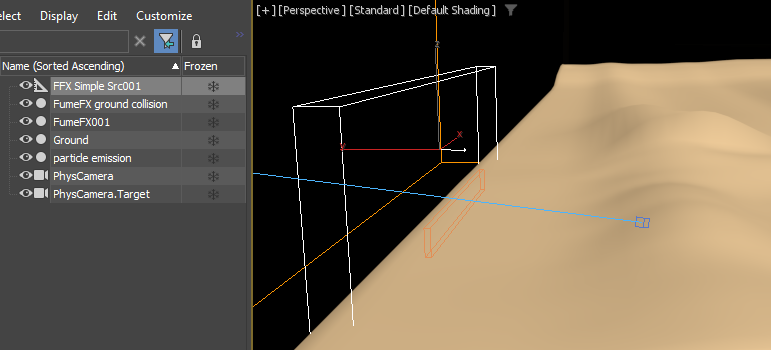
Our starting scene has FumeFX grid with a Simple Source and a collision ground plane.
Setting up a FumeFX
For a Simple Source we have a box that covers some area of the FumeFX grid and we will use it as our wind source.
We will emit smoke as well so we can visualize in a viewport where the velocities are and how they are moving so we can visualize how leaves will be moving along those velocities.

Directional velocities are set to 1.0 which means that this source will emit velocities in the vector direction with the Turbulence Amount 1.0 and the Scale is 10 units.
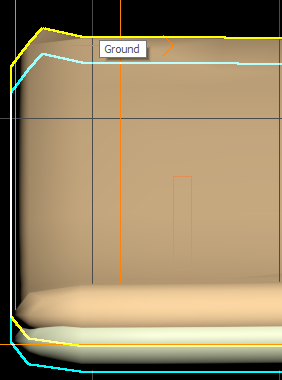
When we open up FumeFX we have selected FumeFX simple source and FumeFX ground collision. We have two different ground planes, one is the Ground which we will use in tyFlow as a collision object for our leaves and we have another ground plane (FumeFX ground collision) that is a little bit offset from the first one. This is because when FumeFX emits velocities in the grid it will collide with this collider and velocities that are one voxel thick might not be deep enough for some leaves that may get stuck inside the mesh. We want some areas that are around the tyFlow collision mesh to have velocities so we can move leave that eventually get stuck on the surface.
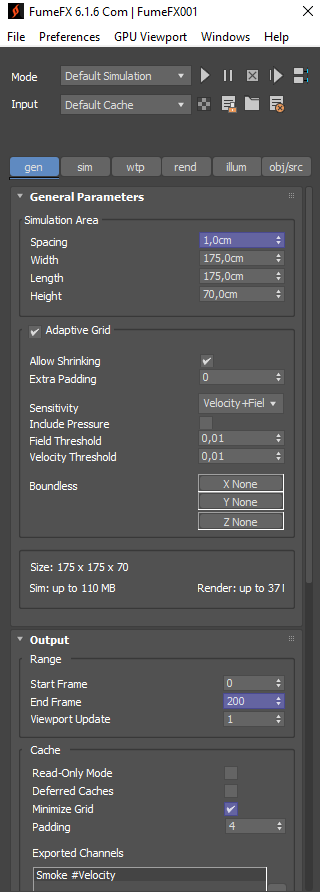
In the FumeFX grid, it’s a simple simulation where we have simple source as a source and we have FumeFX ground collision as a collision object. So, velocities will flow along those small hills.Spacing is 1 centimeter and we will simulate for 200 frames.With Minimize Grid enabled all the area that is empty inside the grid will be erased and saved to disk so you don’t waste time for saving and rendering.
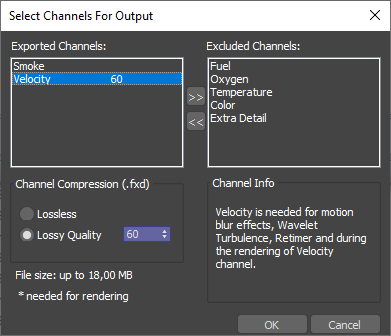
Exported channels, we will export smoke and for velocities we have chosen Lossy Quality of 60 which means that we will lossy compressed to disk, because we don’t need details, we will just use them to follow the tyFlow particles and we will playback for 200 frames.
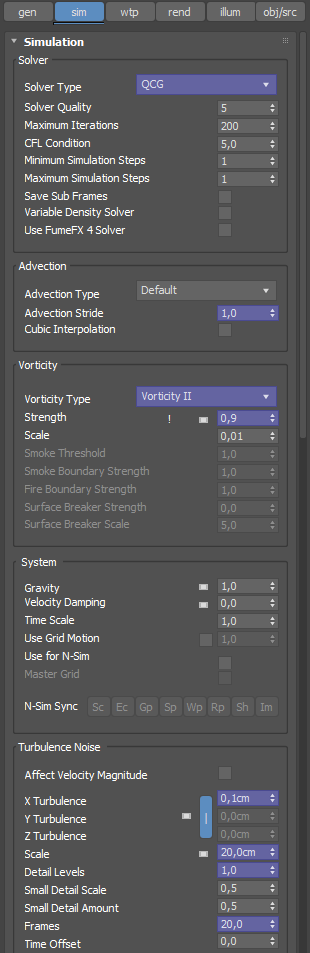
At Simulation tab we will use QCG solver with default parameters, Advection Stride of 1 and we will use Vorticity II and Vorticity Strenght is 0.9.
We will have a little bit of turbulence in all directions with a Scale of 20, Frames 20 and Detail levels1.
We don’t need to simulate fuel and we will simulate smoke just for the visualization of the flow, of course.
We will not cache temperature as it’s disabled in the Simple Source. For the rendering we can just enable smoke for the viewport and we are ready to start our simulation.
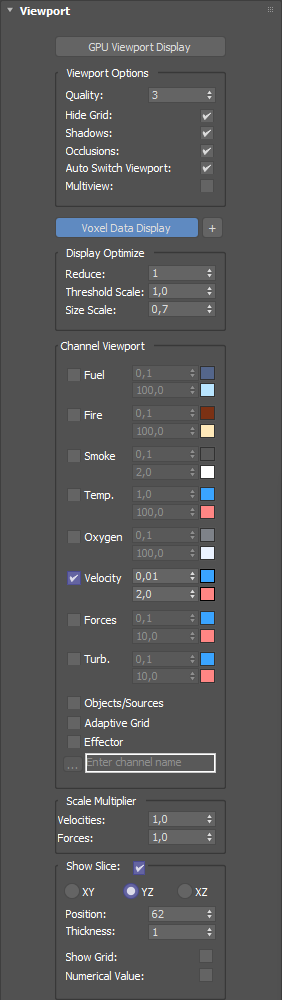
During the simulation we can select FumeFX and we will want to display our velocities. Before you click the Voxel Data Display let’s enable Velocities and we will display them in a slice so that’s the Y and that’s the Z axis so this position should be inside a grid. We can enable Voxel Data Display to see where the velocities are. With this threshold you change basically the colors between minimum and maximum velocity so we’ll pause here until the simulation is done. This is a very simple simulation and it should be done within a few minutes. So, let’s see what we have here.
We have nice velocity field until frame 200 and if we enable Smoke this is how it propagates along those velocities and that will be perfectly fine for leaves. If you see this slice (let’s show the wireframe), velocities go a little bit beneath the first mesh, the collision mesh for tyFlow and our FumeFX collision mesh so that’s what we wanted . Now, we are going to create a tyFlow.

Setting up a tyFlow
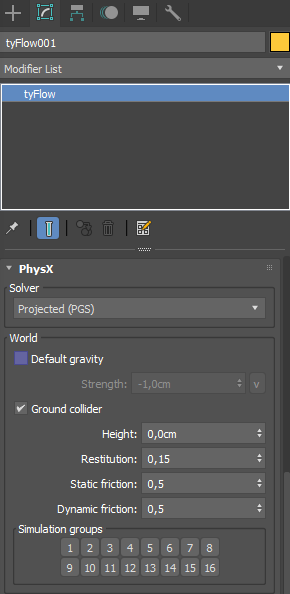
We can disable display. We will create tyFlow somewhere. We will open the editor and we will disable Default Gravity.
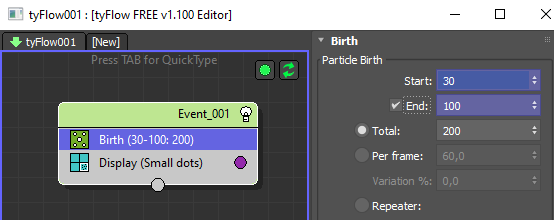
We are going to use Birth operator and we can start particles from frame 30 until some FumeFX velocities get developed. We will stop emitting at frame 100.
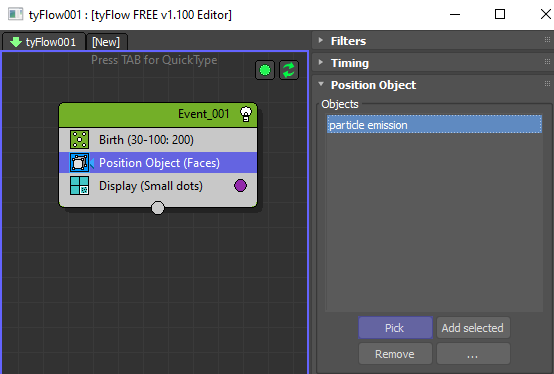
We will add Position Object and we will position it on the box. We have particles created on those faces.
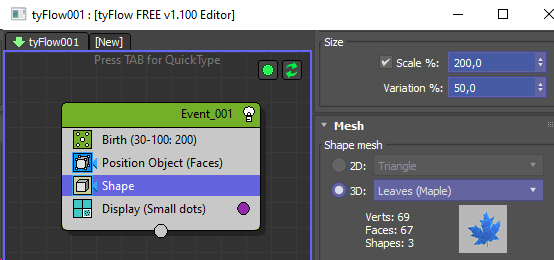
We will add them a leaf shape. Let’s make it a maple leaf and we will Scale them around 200 and Variation 50.
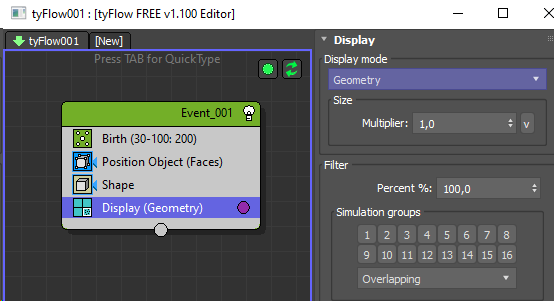
For Display we will use Geometry.

They will be born inside the box and we will add some initial rotation. Random 3D will be ok and we will leave it just at default as it is.
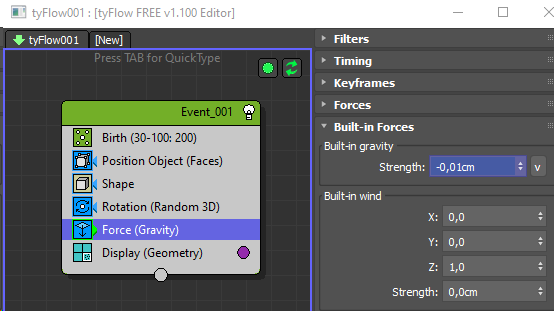
As we have remove default gravity we will use Force. If we leave it at -1 at default value you will see that those leaves are falling really really fast. We are going to reduce it to -0.01 so the leaves will be falling naturally.

We will simulate the air friction by the Slow operator. We will slow it like 2%, that will be just fine.

Now, we will add the PhysX collision. We will add PhysX Shape (Convex Hull) and we need to add PhysX Collision, Pick our Ground object as a collider and select Mesh for Hull type.. We need to move the PhysX operators below other tyFlow operators you have and you will see that leaves will collide with the ground plane.
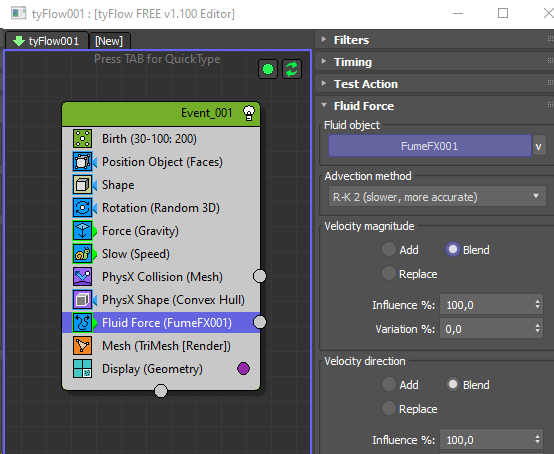
Now, we need to add the Fluid Force. We will have to pick the FumeFX node and we are going to leave the grid velocities to be blended what’s computed within the tyFlow and for rendering we will need to add a Mesh. For the collision, we have set as a Hull Type a Mesh and for the leaves we use Convex Hull which will be ok for this scene.
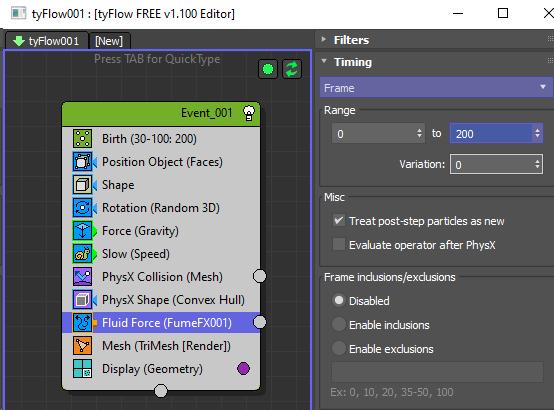
When you move the slider tyFlow goes through the frames and advects the velocities and our leaves along FumeFX grid so if you go to the final frame it takes some time for the tyFlow to cache all the particles. If we play back you see the leaves that are moving along FumeFX grid velocities but they are moving even for the frames that are not simulated. We have to go back to tyFlow and to the Fluid Force. change Timing but make sure that whatever you chage in tyFlow with the Fluid Force you rewind your time slider back because otherwise whatever change you do tyFlow will have to go through all the frames to include your change.So, we will use the Frame from 0 to 200 and we will let tyFlow to recompute our simulation.
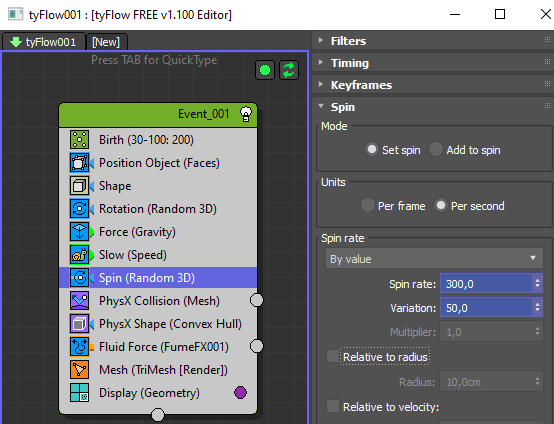
Once completed, you will notice that the simulation is quite different now, the leaves will be moving for 200 frames and later on, because there are no FumeFX velocities, the leaves will start falling to the ground floor. What we need to add is a bit of spin to the leaves. Make sure to move your time slider all the way to the start. In the tyFlow we will add Spin, set Spin Rate to 300 and Variation of 50 will be ok.
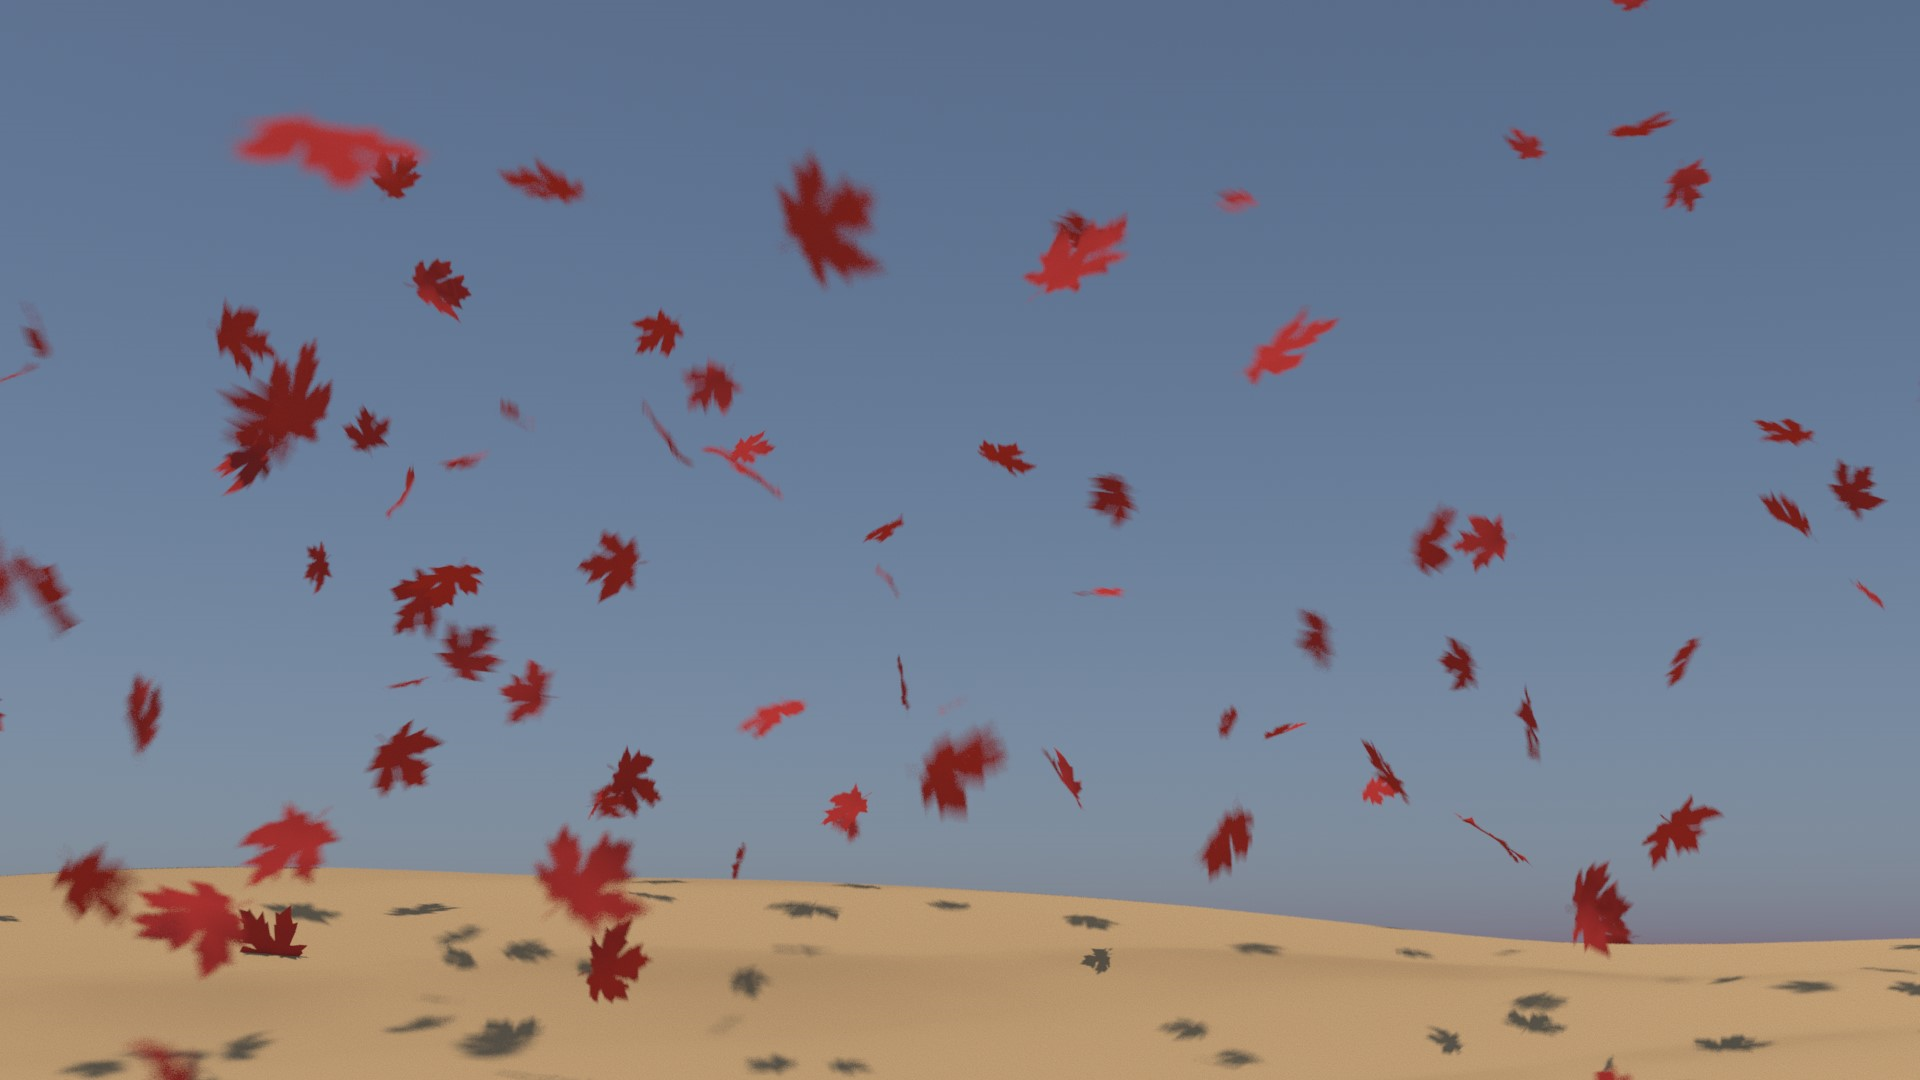
Let’s compute everything again. When the simulation is done you can see that there are nice tumbling in leaves when they move so it looks a little bit more natural.