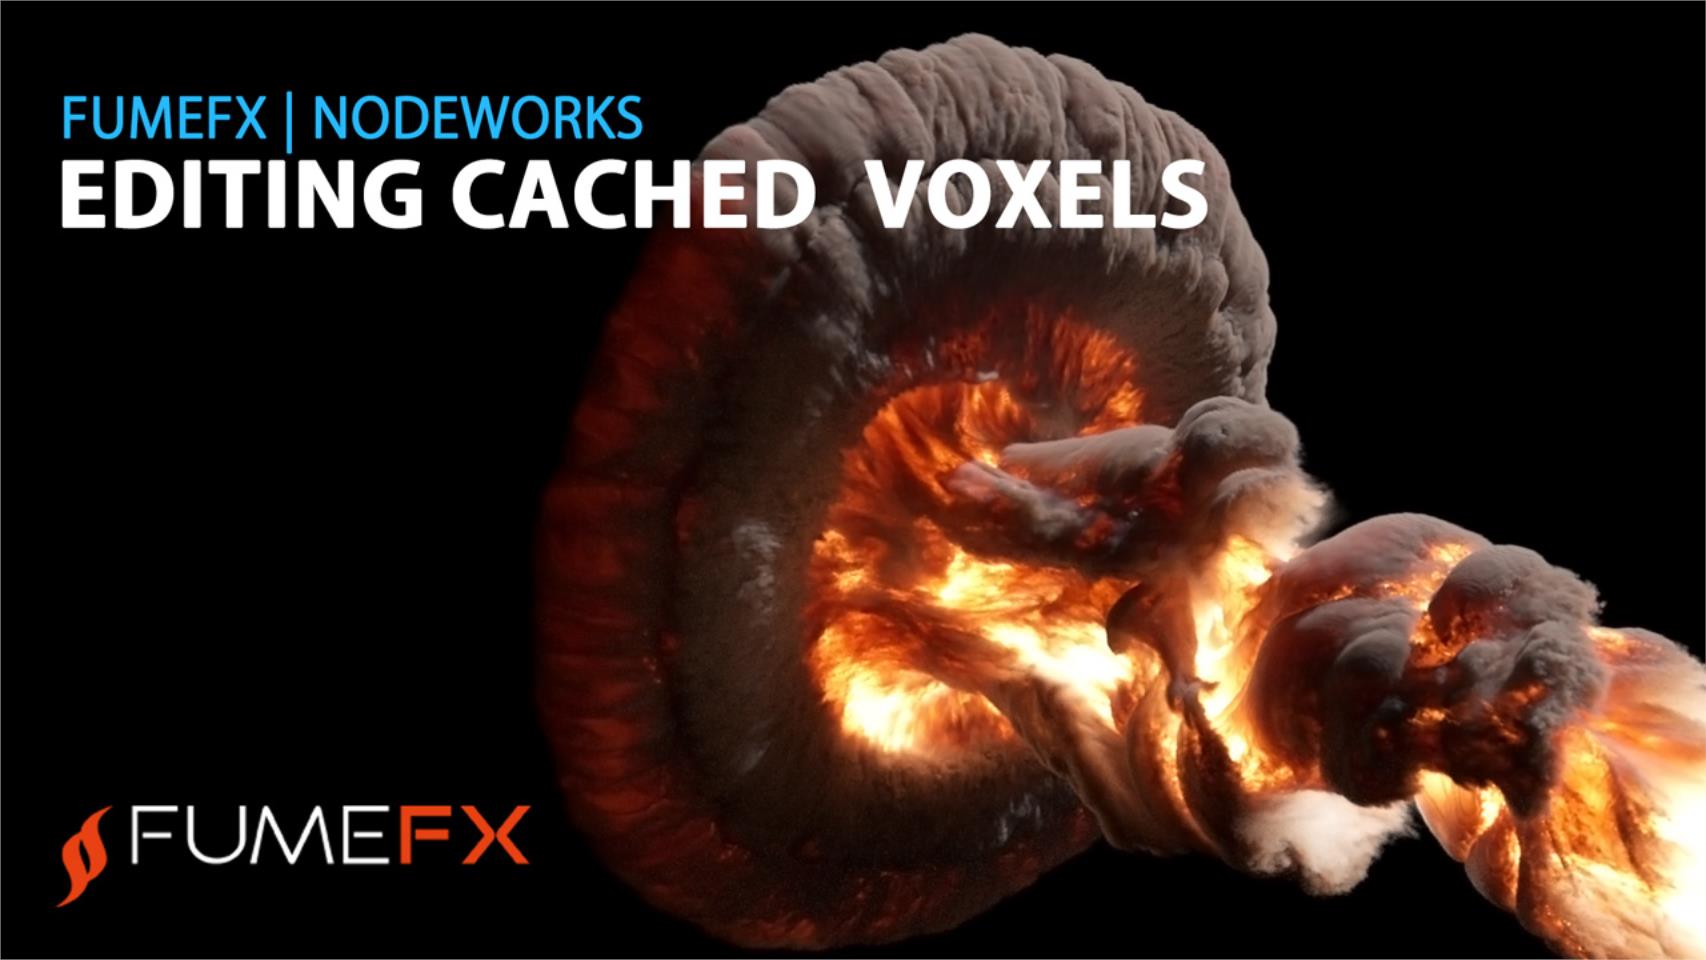
Editing Cached Voxels – Velocity Based Emission
In this tutorial you will learn how to use Load Grid node in combination with other nodes to alter the FumeFX grid content and how to cache those changes.
Load Grid Node
For a start you will need a startup file that can be downloaded from: https://bit.ly/3OXXvNU
In 3ds max, select File->Open, and the file EditVoxels_tut_start.max
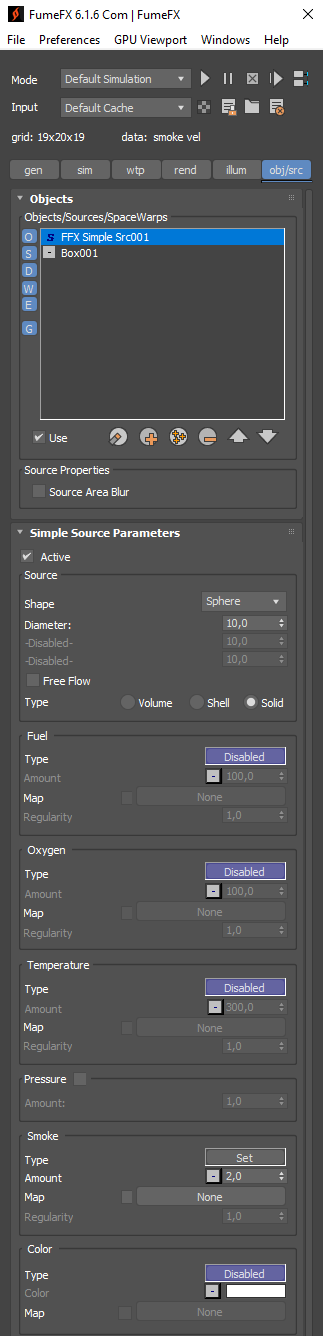
Our starting scene has FumeFX grid with a Simple Source that emits smoke towards the collision box.
There is no temperature or fire added so that the smoke doesn’t rise.
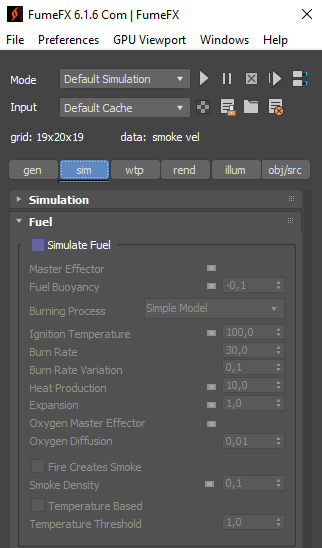
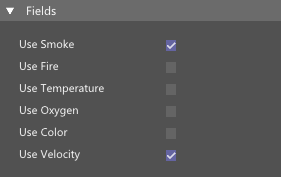
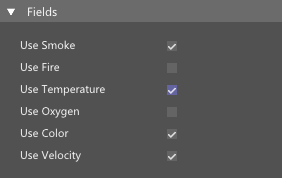
Exported Channels are going to be Smoke and Velocity only, and we will also disable Fire simulation.
|
|
|

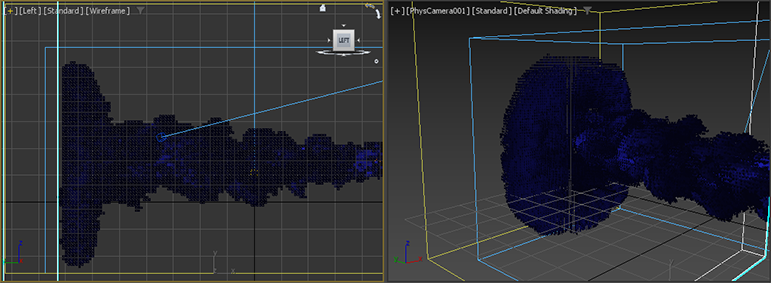
Now, when we run the FumeFX simulation we can see that smoke hits the box located at the end of the grid. We will use the NodeWorks to show you how powerful and flexible this system is when it comes to FumeFX caches post processing.

Go to the Create Command Panel, select FumeFX from the dropdown list, then click on the NodeWorks button.
Create NodeWorks in the scene and click on the Open Editor button to open the node editor.
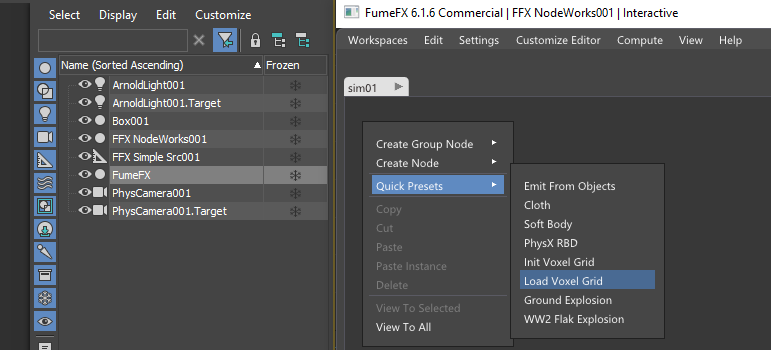
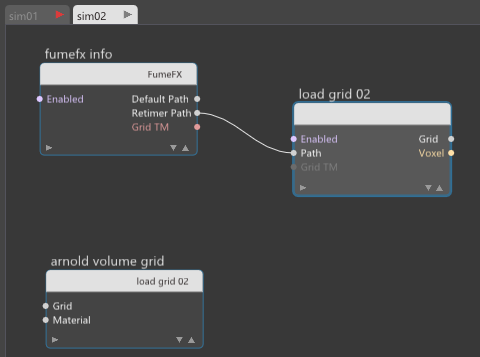
Our first task will be to fade smoke as it approaches the box, so we’ll need a way to load existing caches. This is the task for the Load Grid node that can load FumeFX caches of any vdb. We will also need the Display Grid node so we can directly see all the changes we’re doing. The fastest way to start is to select FumeFX grid in the scene, right click in the NodeWorks editor, choose Quick Presets option and click on the Load Voxel Grid preset.
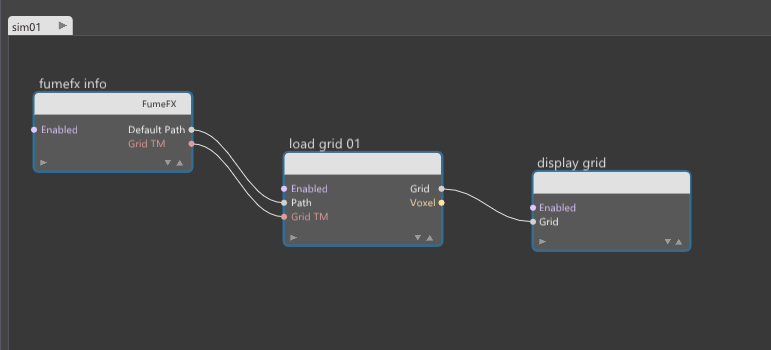
It will automatically create the FumeFX Info node that already has added the FumeFX grid you had selected. It passes the FumeFX Default output path to the Load Grid node as well as the current transformation matrix. This is very handy as whenever you change FumeFX output path it will be automatically updated for the Load Grid node. We can now hide the FumeFX object and we’ll use the display from the Display Grid node.
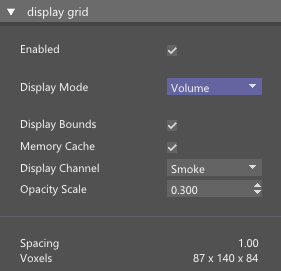
In the Display Grid node we will set the Display Mode to Volume.
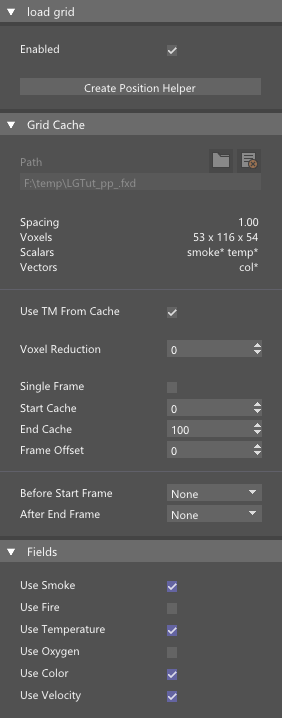
Within the Load Grid node we are going to load Smoke and Velocitiy fields – those are fields that we have exported from the FumeFX simulation. Those fields will be loaded for each frame which means that whatever operation you do on those two fields it will be only for that particular frame.
Fading smoke based on object distance

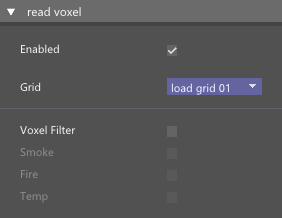
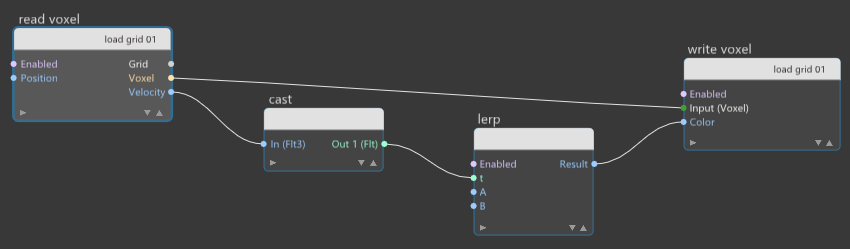
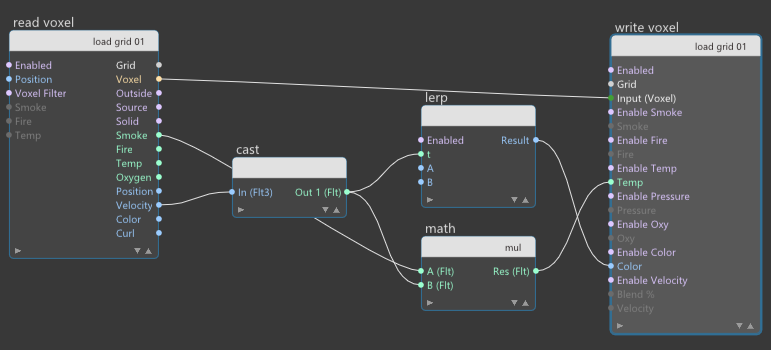
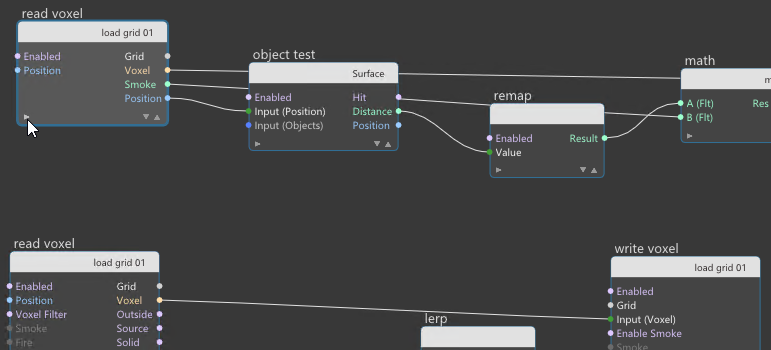
Now that we have desired fields loaded into the memory, we need to access them on a voxel by voxel basis. So, let’s create the Read Voxel Node.
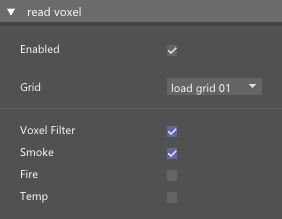
This node will go over every single voxel inside the grid and set its output pins and values which we can use to do basically any required operation on voxels. We will work only on voxels that contain smoke, so we can enable smoke filter inside the Read Voxel Node. This is also a great optimization option as we can skip all these calculations on voxels that do not contain smoke. In most cases this can reduce processing time by two thirds since majority of voxels does not contain smoke.
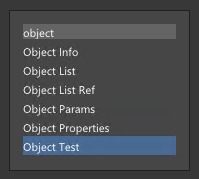
Since our task is to detect voxels that are in the proximity of the box and to fade smoke in voxels that are close to it, we need to create the Object Test node. Press TAB key and start typing object and it will narrow down the search to a few nodes. Select Object Test from the list and create Object Test node.This node can accept particle or position as input and perform test against user defined objects.
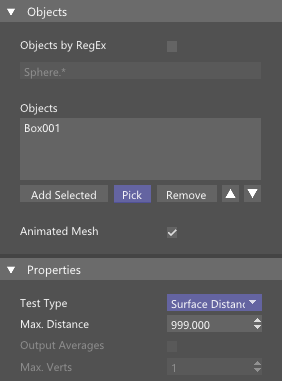
In our case we are going to pick object Box001.
We need to set Test Type to Surface distance while we can leave Max distance as it is. For each voxel, the Object Test node is going to output distance between each voxel and closest point on the object surface. Now when we know the distance, we will gradually fade smoke value for voxels between 40 and 0 units distance from the box, where for the closest ones we will set the smoke value to zero.
If we look at the side view, this will be the area where we will fade the smoke.
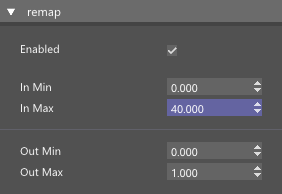
There are several ways how we can calculate this falloff, but the easiest is to use the Remap node then converts input range into user defined range.
In Min is the minimum distance and we put here 0 and for max we will use value of 40. Out Min will be 0 and max 1.0.
Those output values will be used to multiply grid smoke values in such way that the closest voxels will have smoke multiplied by 0 and all voxels between zero and 40 units away will be multiplied by a value between zero and 1, depending on the distance.

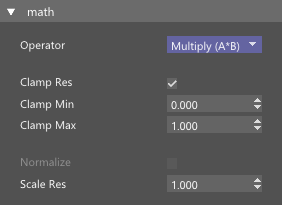
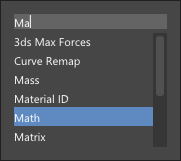
Now we need to create the math node, connect smoke and our multiplier and set the Math node operation to Multiply.
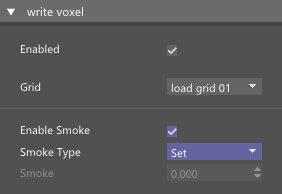
We will need to write those new values back to the grid, so we need to create a Write Voxel node. Within this node we need to enable Smoke, choose “Set” for smoke channel and connect smoke pins.
So for each voxels we are going to perform these calculations and write back to the voxel grid. All what’s left to do is to connect Voxel pins which are used to pass processed voxel data between these two nodes.
Now let’s see our results.

In the side view when we move the time slider we can clearly see how all the smoke is deleted at the proximity of the box. If you want the smoke to fade to zero at some greater distance, increase Min val to 10 for example.

What is great here is that you can quickly see results of the operation and once done, you can cache those changes, but more about it later
Creating smoke color from velocity
This was one example how you can easily tweak FumeFX caches and our second scenario is where you didn’t export Color channel but you have decided that you’d like to create color based on smoke velocity.

For a start, I’ll disable the first setup and just go and create another set of Read and Write voxel nodes.
When creating voxel related nodes, make sure that they point to the proper voxel grid. This is important in setups where you have multiple grids inside one workspace.

Since there is no color channel present in the cache, we’ll have to go to the Load Grid node and enable the Color channel which will allocate Color that we can use.

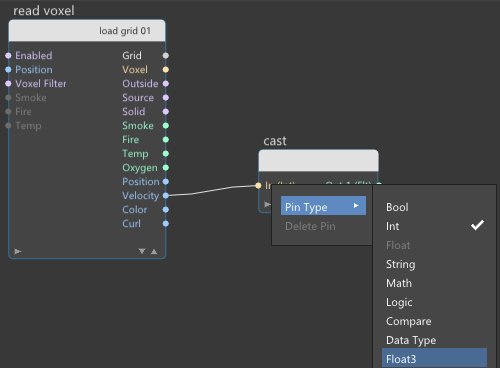
For Read Voxel we need velocity and since it is a vector, we can use cast operator to convert it to float which will gives us its length.
To change input type from Int to Float3 right click on the In (Int) input pin in Cast node and select Float3.
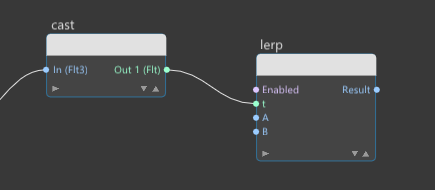
We will use the velocity vector length to interpolate between two colors and to do that we will need to create the Lerp node.
Lerp node uses linear interpolation between values A and B based on the input value t which is expected to be in the range from 0 to 1.
Since Lerp node will do a color interpolation for us, we need to set output pin to Float3, and enable Show as Colors.
Set second color – the one that will be applied in areas where the velocities are the highest, to red.
|
|
|


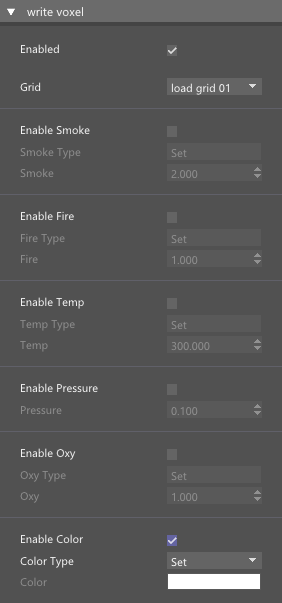
In Write Voxel check Enable Color and connect Result to the Color pin and also don’t forget to connect Voxel pins between Read and Write voxel nodes.
|
|
|
If you check in the viewport, colors are not displayed, that’s because we’re using here the 3ds max volume display that does not support colors.
So, we are going to setup a simple Arnold Standard Volume material.
Let’s open Material Editor and create one Standard Volume material, use Smoke channel for density and for Scatter Color we’ll use the color channel from the grid, so we need to create one Volume Sample RGB and type Color channel under Sampling.
|
|
|
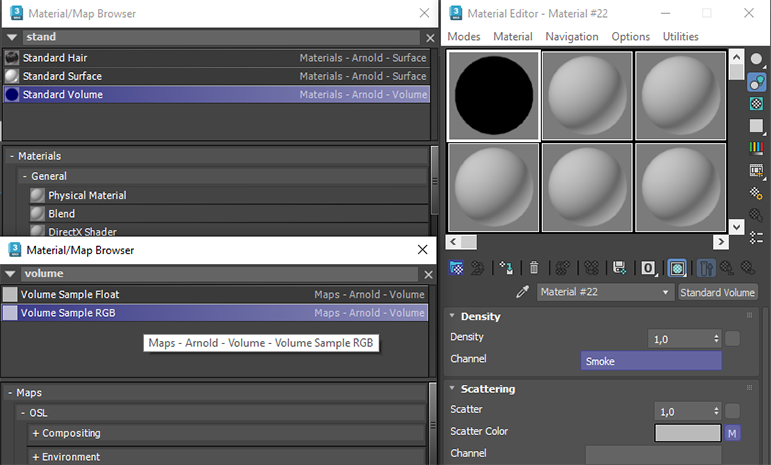

This will give the smoke color based on the color from the grid that we have in the NodeWorks.
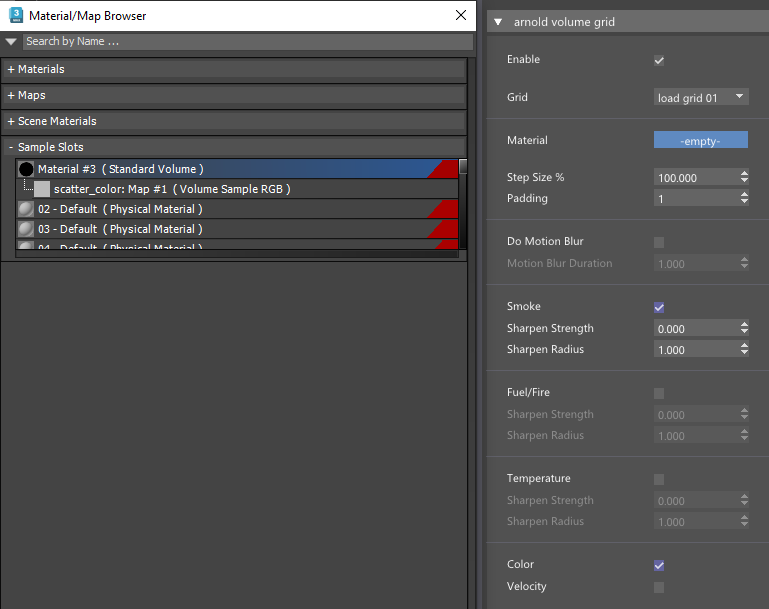
To be able to render voxel grid we need to go back to the NodeWorks and add Arnold Volume Grid node,
Press TAB key and start typing arnold and it will narrow down the search to a few nodes. Select Arnold Volume Grid from the list to create this node.
Enable smoke and color channels and add our Stadard Volume material from material editor.
|
|
|

Now we can open the Arnold Render View to directly see our results.
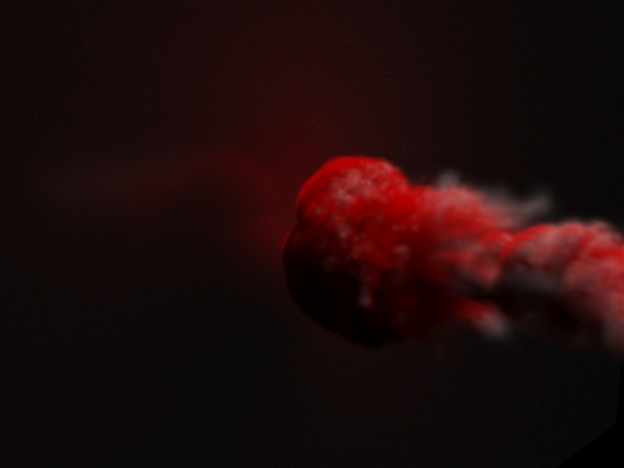
All the smoke is red which means we’ll need to scale down the input as velocities are high so most of them falls into the red color range– this means that the input t of the Lerp node has values near one and above.
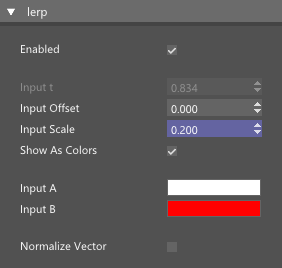
Let’s scale down by factor of 0.2.
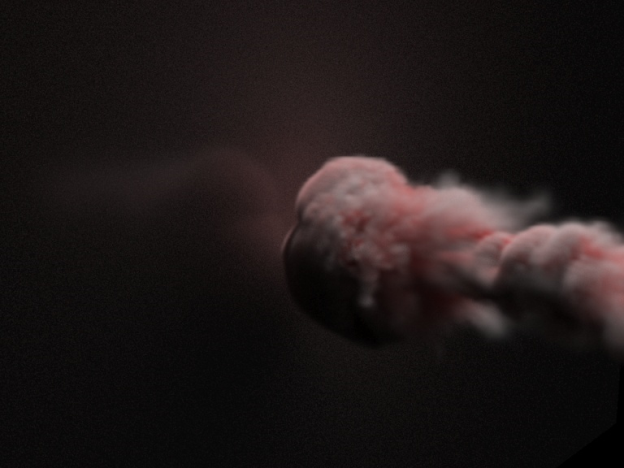
Now you can see that there is much more white color and less red.
Adding temperature and emission based on velocity
What if we want to make this smoke emissive where emission is based on velocity?
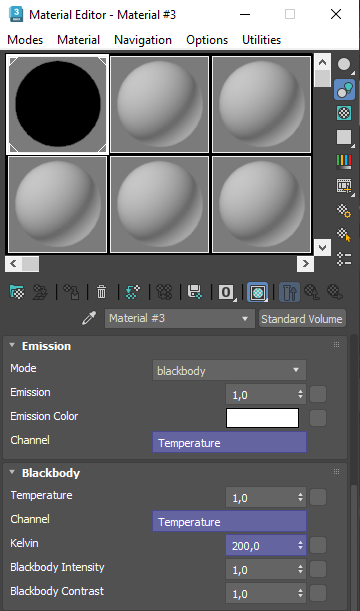
That’s easy to do as we can use the Temperature channel as emission channel inside the Arnold Standard Volume.
In Load Grid enable Temperature which will allocate temperature field but we will also have to enable it within the Arnold Volume Grid node.
For Write Voxel, enable Temperature first. We want the smoke emissivity to be proportional to its density and velocity so we will multiply smoke value with velocity.
|
Load grid node |
Arnold Volume Grid node |
Write Voxel node |

From Read Voxel drag from the Smoke pin, press tab and type Math to create the math node.

Choose operation type to Multiply and connect Cast node output to the Math node second pin.
And now connect the Math result to Write Voxel Temp pin to write values to the temperature channel. This setup will multiple smoke with velocity and write into temperature channel
In Arnold Render View nothing happens as we need to do small changes to the Arnold Standard Volume.
Rename the channel to upper case Temperature and increate Kelvin to 200.
Enable the first set of nodes so that we do have that smoke splash on the box.
Now you can work on the voxels and interactively see result within the Arnold Render View.
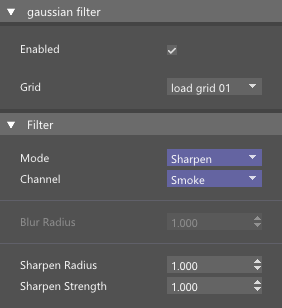
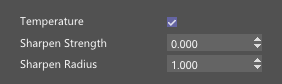
To get more detail out of our simulation, we can apply sharpening to the caches, just like there is render time sharpening with the FumeFX shaders. To do that, create the Gaussian Filter node and change mode to Sharpening. Set Smoke sharpening strength to 1.0. Sharpening will be applied to each frame and you can see the results immediately within the Arnold render view.
Exporting grid caches from NodeWorks
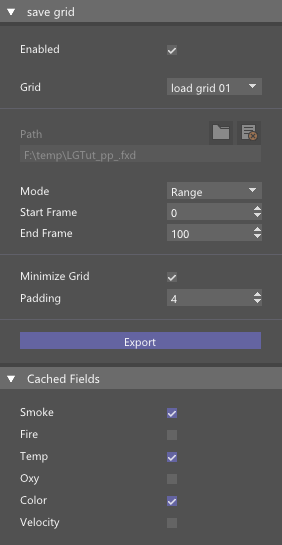
If you have detailed grid all these calculations can take some time, so you can go ahead and cache all of this.
We will create a Save Grid node and enable smoke, color and temperature.
For a path, we are going to use the FumeFX info node and this time we will use the Retimer path as output path for the Save Grid caches.
Now we can export those caches by clicking on Export button in Save Grid node.
|
|
|

Once that caching is finished, you might want to load those final caches back to the NodeWorks, so we can now disable this tab, create a new one and add Load Grid with path we used to save caches.
We can copy the Arnold Standard Volume, but make sure that you change the Grid to the grid used in this tab.
You can see from the Arnold Render View that our cached changes are rendering.
|
|
|
From these examples you can see how valuable NodeWorks is when it comes to complete control over your caches, cache tweaking and re-caching.