Tutorials
Tutorial 01: Candle Flame
In this introductory tutorial you will learn how to use FumeFX at a basic level. It will also introduce you to the FumeFx UI.
In 3ds Max, select File->Open, and from your /Scenes/FumeFX/ Tutorials folder, select the file Tut_01_start.max.
This scene is nothing more than simple candle geometry. We're going to add the flame to the wick.
After the file loads, go to the Create Command Panel, select FumeFX from the dropdown list, then click on FumeFX.
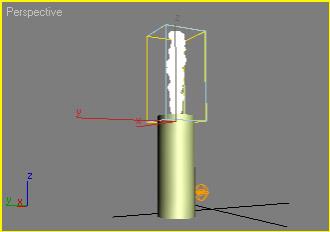
From within the Top viewport, draw out a FumeFX Grid as shown below to roughly match the size of the simulation area at the top of the candle. Then in any viewport, move the FumeFX Grid gizmo into position at the top of the candle geometry.
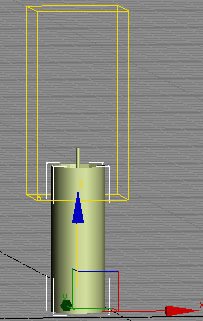
Note: Make the FumeFX grid only as large as the simulation area you need. This will affect your simulation times in a big way.
Now that you have a FumeFX Grid in place, you need to create a Source to help drive the simulation.
Back within the Create Command Panel, go to the Helpers section, choose FumeFX from the dropdown menu, then select Object Src.
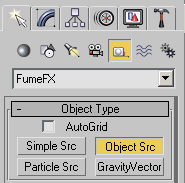
Drag out the Object Source gizmo outside of the FumeFX grid in any viewport.
Since the FumeFX Object Source simply informs the FumeFX simulation engine of an object you want as part of the sim, it doesn't need to reside within the FumeFX Grid volume.
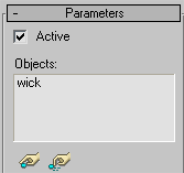
Within the FumeFX Object Source Parameters, click the Pick button, then select wick as your Object. Make sure it shows within the FumeFX Object Source as shown below.
Select the FumeFX Grid gizmo again, then go to the Modify Command Panel.
From the Parameters rollout, click on the Open FumeFX UI button  . This will bring up the FumeFX UI floating dialog window.
The FumeFX UI floating dialog is where you'll add your sources, then set up your simulation.
Select the Obj/Src button at the top of the FumeFX UI dialog.
Within this panel, click the Pick Object icon, then choose the FumeFX Object Source gizmo that you created next to the FumeFX Grid in the 3ds Max viewports.
When done, your FumeFX UI will look like the image below. Be sure to note that all of the controls for the Object Source show up within this panel, so you can tweak your settings for the Object gizmo without having to select it and alter it within the Modify Command Panel.
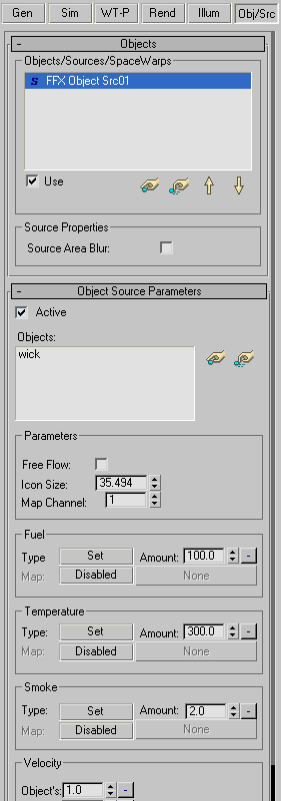
Under the FFX Object Source Parameters rollout, make sure the amount of Fuel is set to 100 and the amount of Temperature is set to 300.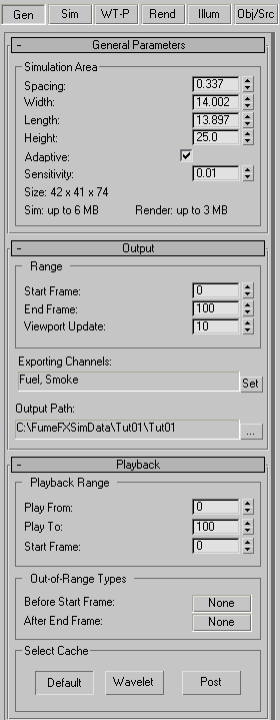
Next, click on the General button in the FumeFX UI.
In the General Parameters rollout change the Grid Spacing to 0.5. This allows you to control the amount of detail in the simulation.
Make sure that the Adaptive checkbox is active.
Under the Output rollout you need to set an output path to store the simulation data. Click on the ellipsis (...) button next to the path and then create and set a new folder location on your hard disk to store the date.
A good option would be to put your simulation data into individual folders. Something on the order of creating a main folder \FumeFXSimData, and then creating new sub-folders for your different sims. You can create a new sub-folder for this one called \FFXTut01.
Now let???s move on and select the Simulation tab.
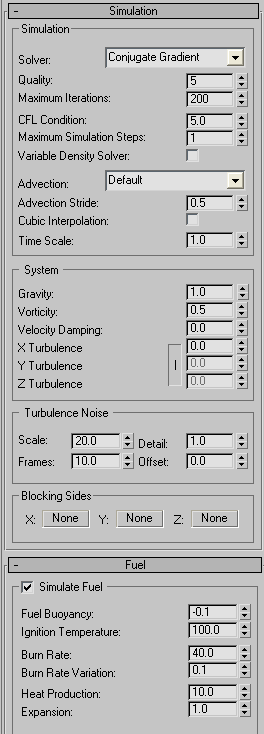
Under the Simulation rollout make sure that Quality is set to 5, Maximum Iterations is set to 200 and the Time Scale is set to 1.
Under the Smoke and Temperature rollout, change Smoke Buoyancy to 0 and Temperature Buoyancy to 2.
Under the Fuel rollout, change the Ignition Temperature to 100, Burn Rate to 40 and the Burn Rate Variation to 0.1.
Now let???s select the Rendering (Rend) tab.
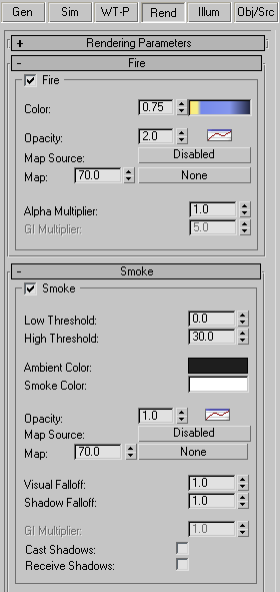
Under the Fire rollout set the Color spinner to 1.25, then right-click on the Color swatch and choose Key Mode.
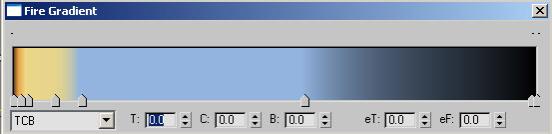
Next, we want to build a gradient for the fire color. Since a candle's flame goes from orange to yellow to blue to black (transparent), that's our goal.
Double-click on the gradient swatch to open up the Gradient dialog. Try to match your Fire Gradient to the image below.
Once the Gradient is set, close that dialog and check to make sure the Fire Opacity is set to 2.0.
Under the Smoke rollout change the Ambient Color to a dark Gray (RGB: 30, 30, 30) and the Opacity to 1.
Now we are all set to run the simulation.
Choose the start Simulation button from the top of the FumeFX UI dialog.

At this point, the simulation begins and you will see a progress dialog pop up.
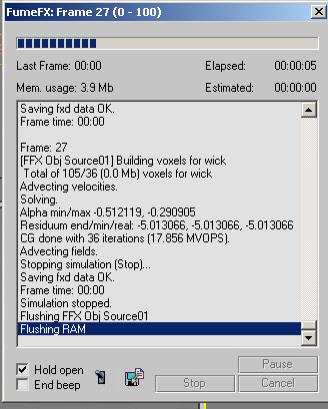
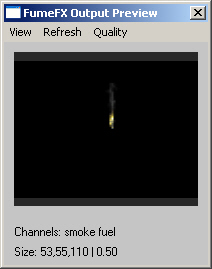
While the simulation is running, you can click on the Preview Window icon to see how your candle flame will look.
When the simulation ends, if you scrub your frame slider you'll notice that it doesn't appear anything has changed in your Max scene. This is due to the fact that you haven't turned on the viewport preview of the simulation. Rest assured that the data is present, it just needs to be made viewable.
Within the Modify Command Panel, go to the FumeFX Grid's Viewport rollout.
Under the Channel / Threshold group of controls, turn on the checkboxes for both the Fire and Smoke.
Scrub your frame slider again.
Now you can see both the fire and smoke voxel simulation solutions within the 3ds Max viewports.
Next, turn the Smoke channel off from the Command Panel.
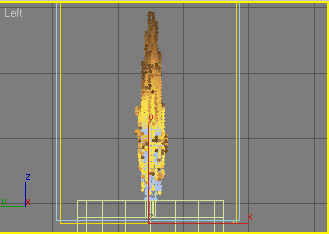
You're left with only the Fire channel's solution displayed in the 3ds Max viewports. What's more, is that you should be able to see the color gradient you set earlier displayed in the voxel viewport representation. This can be a VERY handy way to see how the various aspects of your simulation are reacting. What's more, it means if you want to tweak the coloration, you can do so now and see how it affects your calculated simulation without having to re-run it.
Also, depending on how much height you gave your FumeFX Grid, you will most likely see the smoke hitting the top part of the volume and disappearing. Keep the boundary edges in mind when setting up your scenes. Depending on what effect you're after, you'll want to make sure you have enough room to let your simulations run naturally without hitting the boundaries of the volume.
Finally, make sure your Perspective viewport is active and render a frame.
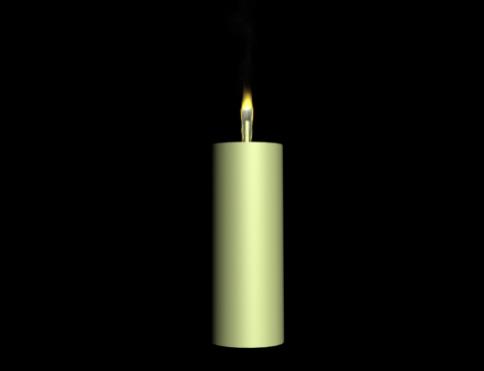
On your own, you should render out the entire animation to see how the flame behaves. Also, experiment with the Smoke Buoyancy and Temperature Buoyancy spinners. You can change those values while the simulation is running and see how these instantly affect the movement and height of the flame and surrounding smoke.
While fairly simple, this first tutorial should have given you some ideas of the potential and power within FumeFX. We're not done yet - there's still more to come.